


A solar generator system is an excellent way to harness renewable energy for daily use, providing a reliable and eco-friendly power source for your home, RV, or emergency preparedness. Building your own solar generator allows you to customize it to your specific energy needs while saving money compared to purchasing a pre-built system. Here’s a step-by-step guide to help you build a solar generator system capable of meeting your daily energy requirements.
Step 1: Determine Your Power Requirements
The first step in building a solar generator is to calculate your daily power consumption. This will help you size your solar panels, battery bank, and inverter accordingly.
- List Your Appliances and Devices: Make a list of all the appliances and devices you intend to power with your solar generator (e.g., refrigerator, lights, laptops, fans).
- Calculate Daily Energy Usage: Find the wattage of each appliance (usually listed on a label or in the user manual) and estimate the number of hours each will be used per day. Multiply the wattage by the hours of use to determine daily watt-hours (Wh).
- Example: A 60-watt light bulb used for 5 hours a day = 60W x 5h = 300Wh.
- Total Daily Consumption: Add the daily watt-hours for all devices to get your total daily energy consumption.
- Example: If your total is 2,000Wh, this is the amount of energy your solar generator needs to supply daily.
Step 2: Choose the Right Solar Panels
Solar panels convert sunlight into electricity. The amount of power they can generate depends on their wattage rating and the amount of sunlight available in your location.
- Calculate the Required Solar Panel Capacity:
- Determine the total wattage of solar panels needed by dividing your total daily consumption by the average peak sunlight hours in your location.
- Example: If you need 2,000Wh daily and you get an average of 5 peak sunlight hours, you will need about 400W of solar panels (2,000Wh ÷ 5h = 400W).
- Choose the Type of Solar Panels:
- Monocrystalline Panels: More efficient and space-saving, ideal if you have limited installation space.
- Polycrystalline Panels: Less expensive but slightly less efficient than monocrystalline.
- Consider Panel Size and Placement: Ensure that you have enough space for your solar panels and consider factors such as roof pitch, shading, and orientation to maximize sunlight exposure.
Home Solar Panel Module for Off-grid Application


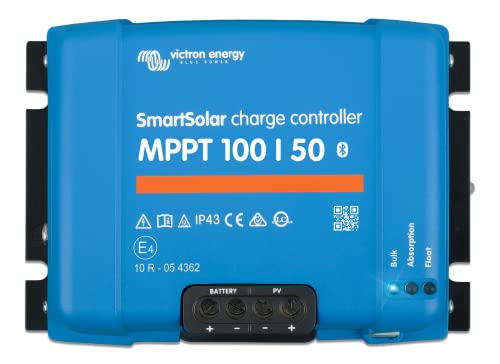
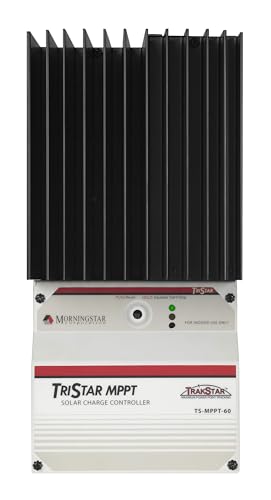
Step 3: Select a Solar Charge Controller
A solar charge controller regulates the voltage and current coming from the solar panels to the batteries, preventing overcharging and extending battery life.
- Determine the Type of Charge Controller:
- PWM (Pulse Width Modulation): More affordable but less efficient, suitable for small solar systems.
- MPPT (Maximum Power Point Tracking): More expensive but up to 30% more efficient, ideal for larger solar systems.
- Size the Charge Controller: The controller should handle the maximum current generated by your solar panels. A general rule is to choose a controller rated for at least 25% more amperage than your panels produce.
- Example: If your panels produce 20A, choose a charge controller rated for 25A or higher.
Home Solar Power System Charge Controller


Step 4: Choose the Right Battery Bank
Batteries store the energy generated by your solar panels for use when the sun isn’t shining. The type and size of your battery bank depend on your energy requirements and budget.
- Calculate the Battery Capacity:
- Determine the required battery capacity in watt-hours by multiplying your total daily consumption by the number of days you want your system to run without sunlight.
- Example: For 2,000Wh per day with 2 days of backup, you need 4,000Wh of battery capacity.
- Choose Battery Type:
- Lead-Acid Batteries: More affordable but heavier and require more maintenance. Suitable for occasional use.
- Lithium-Ion Batteries: More expensive but lighter, longer-lasting, and require less maintenance. Ideal for daily use.
- Determine the Battery Voltage: Most solar setups use 12V, 24V, or 48V batteries. Higher voltages are more efficient for larger systems.
Home Deep Cycle Battery for Solar Power System


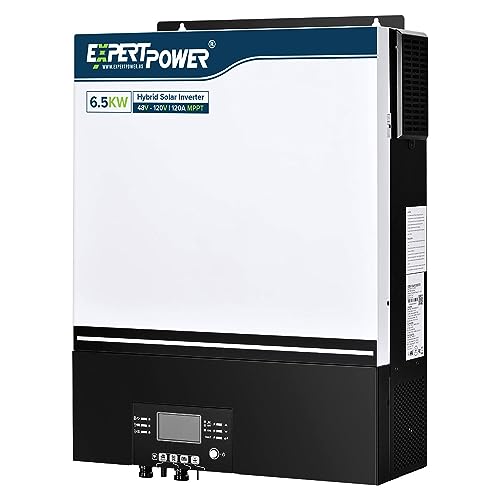
Step 5: Select an Inverter
An inverter converts the DC (direct current) stored in your batteries into AC (alternating current) used by most household appliances.
- Determine Inverter Size:
- The inverter should be large enough to handle the total wattage of all devices you want to run simultaneously.
- Example: If you want to power a 600W microwave and a 400W refrigerator at the same time, you need at least a 1,000W inverter.
- Choose the Type of Inverter:
- Pure Sine Wave Inverters: More expensive but provide cleaner power, suitable for sensitive electronics.
- Modified Sine Wave Inverters: Less expensive but may not be suitable for all appliances.
Home Solar System Power Inverter


Step 6: Assemble the Solar Generator System
- Mount the Solar Panels: Install the panels on a roof, ground, or portable stand. Ensure they are securely mounted and positioned to receive maximum sunlight.
- Connect the Solar Panels to the Charge Controller: Use appropriate wiring to connect your solar panels to the charge controller. Ensure the connections are secure and waterproof.
- Connect the Charge Controller to the Battery Bank: Connect the charge controller to the battery bank, making sure to match the voltage settings and use fuses or circuit breakers for safety.
- Connect the Inverter to the Battery Bank: Connect the inverter to the battery terminals. Use heavy-gauge cables and fuses to prevent overheating.
- Test the System: Check all connections and ensure the system is working correctly. Monitor the charge controller and inverter to confirm they are properly regulating and converting power.
Step 7: Monitor and Maintain Your System
- Regular Monitoring: Keep an eye on battery levels, charge status, and inverter output to ensure optimal performance.
- Maintenance: Clean solar panels regularly to maximize sunlight absorption. Check wiring and connections periodically to prevent wear and tear.
- Battery Care: Follow manufacturer recommendations for battery maintenance, including charging cycles and temperature management.
Conclusion: Enjoy Your DIY Solar Generator System
By following these steps, you can build a solar generator system that meets your daily energy needs while reducing your reliance on the grid. Whether you’re preparing for emergencies, living off-grid, or just looking to cut energy costs, a DIY solar generator is a practical, sustainable solution. Start small and expand your system over time as your needs grow and your experience increases.
In short, the components needed for a complete solar generator system are:
- Solar Panels: Choose panels based on your energy needs and available space. Monocrystalline panels are often the most efficient.
- Charge Controller: This regulates the voltage and current coming from the solar panels to the battery.
- Battery Bank: Deep-cycle batteries are ideal. Lithium-ion batteries are becoming popular due to their efficiency and long lifespan.
- Inverter: Converts DC power from the batteries to AC power for your appliances.
- Wiring and Connectors: Ensure you use appropriate gauge wires for your system’s amperage.
- Mounting Hardware: For securing solar panels.
- Circuit Breakers or Fuses: For system protection.
Home Solar Power System Complete Kits. Assembly Required!

![[Ultra] ECO-WORTHY 1200W 24V 5.52KWH Lithium Battery Solar System Off Grid:6pcs 195W Bifacial Solar Panels+2Pcs 12.8V 280Ah Lithium Battery+60A MPPT Charge Controller+3000W Pure Sine Wave Inverter](https://m.media-amazon.com/images/I/51zeHwxsFrL._SL500_.jpg)
![[Pro] ECO-WORTHY 1200W 24V 5.5KWH Lithium Battery Solar System Pro Off Grid: 6pcs 195W Bifacial Solar Panels+2Pcs 25.6V 100Ah Lithium Battery+60A MPPT Charge Controller+3000W Pure Sine Wave Inverter](https://m.media-amazon.com/images/I/51hw4RVu1WL._SL500_.jpg)


Building a solar generator system for daily use is a significant investment in sustainable living. While the initial setup can be complex, the long-term benefits of renewable energy and potential energy independence make it a worthwhile endeavor. As technology advances, these systems are becoming more efficient and user-friendly, making solar power an increasingly viable option for daily household energy needs.
Meet Hajime, your passionate blogger-prepper who believes in empowering individuals and communities with the knowledge and skills necessary to make the art of prepping accessible and practical for everyone.


